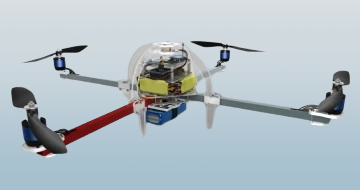
Make an Open Source Drone by Udemy
A fun project in which you learn about drones by making one. Use the Pixhawk or Multiwii AIO flight controllers
Course Highlights
- Understand the different types of multi-rotor drones.
- Understand flight terminology.
- Understand the principles of drone flight.
- Understand the roles of propellers, motors, flight controller, ESC in drone flight.
- Understand the use of LiPo batteries and their use.
- Understand the use of GPS in drone flight.
- Understand how to bind a radio receiver and transmitter.
- Understand the necessary drone pre-flight checks.
- Understand the basic safety and legal requirements involved in recreational drone flight.
- Assemble a quadcopter from parts available in the market.
- Upload the MultiPirateNG firmware to the Crius V2 flight controller.
- Use the open source Mission Planner software to configure a drone.
- Practice flying their quadcopter and fun while becoming better pilots!
- Learn how to use the Pixhawk flight controller.
Skills you will learn!
Curriculum
3 Topics
What is this course about
Parts and Tools
Crius or Pixhawk? Read this before you continue
13 Topics
Introduction
Another drone classification
Types of multi-rotor drones
Roll pitch yaw
Controlling the motors
Procuring the right parts
Terminology
Propellers
Battery and charger Part 1
Battery and charger Part 2
Flight controller and its peripherals
Other tools and things
Conclusion
5 Topics
Introduction
Preparation
Attach the connectors to the ESC wires
Attach connectors to motor wires
Conclusion
5 Topics
Introduction
About the power distribution board
Solder the ESC power wires
Solder the battery wires and connectors
Conclusion
5 Topics
Introduction
Attach the motors to the arms
Attach the arms to the power distribution board Part 1
Attach the arms to the power distribution board Part 2
Conclusion
11 Topics
Introduction
The PWM and PPM signalling options Part 1
The PWM and PPM signalling options Part 2
Setup radio receiver and flight controller to use PWM
Connect the GPS module to the flight controller Part 1
Connect the GPS module to the flight controller Part 2
Connect the GPS module to the flight controller Part 3
Connect the GPS module to the flight controller Part 4
Attach flight controller to chassis
Connect ESCs to flight controller
Conclusion
5 Topics
Introduction
A primer on batteries
How to charge the battery
Attach the battery to the frame
Conclusion
4 Topics
Introduction
Clear the EEPROM
Download and install the firmware
Conclusion
4 Topics
Introduction
Binding receiver and transmitter
Understand the transmitter basic operations
Conclusion
6 Topics
Introduction
Download and install Mission Planner
Mission Planner setup Part 1
Mission Planner setup Part 2
Test the GPS module
Conclusion
5 Topics
Introduction
Calibrate the ESCs
Attach the propellers
Safety and legal issues
Conclusion
4 Topics
Introduction
Pre-flight checks
The first flight
Conclusion
16 Topics
800 - Section introduction
810 - Why upgrade- The Pixhawk flight controller
820 - Disassembly
830 - A review of the upgrade components
840a - Assembly Part 1 - Propellers
840b - Assembly Part 2 - ESC red wire insulation
840c - Assembly Part 3 - Pixhawk base
840d - Assembly Part 4 - GPS antenna
840e - Assembly Part 5 - Pixhawk assembly
840f - Assembly Part 6 - Buzzer safety button power module
840g - Assembly Part 7 - Wirings
840i - Battery and power connections
840h - Verify wiring in Mission Planner
850 - Attach the propellers
855 - ESC calibration with the Pixhawk and safety switch
860 - Calibration and test flight
14 Topics
Objectives of this upgrade
The MATEK F405TE flight controller: an introduction
Disassemble the Pixhawk drone
Prepare for the assembly: what you'll need
Soldering of wires and connectors
Assembly Part 1
Assembly Part 2
Assembly - Extended version
Wiring verification and first boot
Upload Ardupilot firmware to the MATEK f405TE
Pre-flight calibration with Mission Planner
Calibration for new EMC and motors
Pre-flight modifications
Test flight
2 Topics
What's next?
Bonus Lecture
Make an Open Source Drone

Thank You!
Your review has been submitted successfully.