IIRF Online > Health & Fitness > Yoga > Pranayama > Pranayama (Breathwork) Teacher Training (Yoga Alliance)
Pranayama (Breathwork) Teacher Training (Yoga Alliance) by Udemy
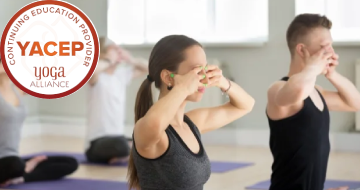
Yoga Alliance Continuing Education Approved Course
Course Highlights
- 14 Different types of Pranayama (Breathwork) Techniques and their Variations
- Introduction to Pranayama & its Philosophy - The Yogic Breathwork
- Practical Pranayama Classes combined with Yoga & Meditation
- Learn basic and advanced breathwork and meditation techniques. Tap into the power of your breath!
- Four aspects of Pranayama and the Five Koshas (sheaths)
- Learn to use the breath to relax, focus and bring health and vitality in your life.
- 10 types of Prana and Pranayama's health benefits
- Ancient Pranayama/ Breathing Techniques as per Yogic Texts
- How to Practice and teach Pranayama
- Relevance of Pranayama in modern life
- Learn the important guidelines for teaching Pranayama
- Anatomy & Physiology of Pranayama
- How to setup and structure a class
- Do's and Don'ts of breathwork & Pranayama
- Advanced Techniques of Pranayama (Breath Retentions)
Skills you will learn!
Curriculum
2 Topics
Welcome Message for you!
Disclaimer of the Course
1 Topic
Video about downloadable Resources & eBooks
12 Topics
Introduction of Pranayama
Pranayama in Ancient Scriptures
5 Factors Influencing the Mind
Introduction of Ashtanga Yoga
First Limb - Yama
Second Limb - Niyama
Third Limb - Asana
Fourth Limb - Pranayama
Fifth Limb - Pratyahara
Sixth Limb - Dharana
Seventh Limb - Dhyana
Eighth – Samadhi
6 Topics
Introduction of Prana Vidya
Five Keys: First Key - Psychic Breath
Five Keys: Second Key - Psychic Sound
Five Keys: Third Key - Psychic Passage
Five Keys: Fourth Key - Psychic Centres
Five Keys: Fifth Key - Psychic Symbol
3 Topics
Vajrasana (Thunderbolt/ Adamantine/ Diamond Pose)
Ardh Padmasana (Half Lotus Pose)
Padmasana (Lotus Pose)
12 Topics
IMPORTANT: About Practical Classes
Guided Meditation: Pillar of Energy (With Kumbhaka Pranayama)
Full Body Yoga Flows (For all levels)
Daily Yoga Flow: Stretch & Strengthen (For all levels)
Yoga Flow to Connect with Yourself (With Surya Bhedana Pranayama)
Energizing Yoga Flow (With Ujjayi Pranayama)
Guided Meditation: Withdrawal of the 5 Senses (With Samavritti Pranayama)
Guided Meditation for Positive Energy (With Viloma Pranayama)
Guided Meditation: Transforming the Emotions (With Kapalbhati Pranayama)
Guided Meditation with Mantra Chanting
Nadi Shodhan Pranayama and Meditation
Yin Yoga Session for Tight Hips & Flexibility
5 Topics
Guidelines of Pranayama
The Power of the Mudras
Brahma Muhurta: Most Auspicious Time
Importance of Ratio and Counts
Nasikagra / Nasagra Drishti (Nose Tip Gazing)
7 Topics
Introduction of Kumbhaka
Benefits & Contraindications of Kumbhaka
Physiology of Kumbhaka
Guidelines for Kumbhaka
Technique 1: Practice: Internal Breath Retention (Ratio of 1:1:1)
Technique 2: Practice: Internal Retention - Extended Exhalation (Ratio of 1:1:2)
Technique 3: Practice: Extended Internal Retention & Exhalation (Ratio of 1:2:2)
26 Topics
Technique 1/Stage1 - Intro (No Ratio Breathing through Individual nostril)
Technique 1/Stage 1 - Practice (No Ratio Breathing through Individual nostrils)
Technique 1/Stage 2 - Intro (Ratio 1:1 Breathing through Individual nostrils)
Technique 1/Stage 2: Practice (Ratio 1:1 Breathing through Individual nostrils)
Technique 2/Stage 1: Intro (Ratio 1:1 Alternate Nostrils No Breath Retention)
Technique 2/Stage 1: Practice (Ratio 1:1 Alternate Nostrils No Retention)
Technique 2/Stage 2: Intro (Ratio 1:2 Alternate Nostrils No Breath Retention)
Technique 2/Stage 2: Practice (Ratio 1:2 Alternate Nostrils No Retention)
Technique 3/Stage 1: Intro (Ratio 1:1:1 with Internal Breath Retention)
Technique 3/Stage 1: Practice (Ratio 1:1:1 with Internal Breath Retention)
Technique 3/Stage 2: Intro (Ratio 1:1:2 with Internal Breath Retention)
Technique 3/Stage 2: Practice (Ratio 1:1:2 with Internal Breath Retention)
Technique 3/Stage 3: Intro (Ratio 1:2:2 with Internal Breath Retention)
Technique 3/Stage 3: Practice (Ratio 1:2:2 with Internal Breath Retention)
Technique 3/Stage 4: Intro (Ratio 1:3:2 with Internal Breath Retention)
Technique 3/Stage 4: Practice (Ratio 1:3:2 with Internal Breath Retention)
Technique 3/Stage 5: Intro (Ratio 1:4:2 with Internal Breath Retention)
Technique 3/Stage 5: Practice (Ratio 1:4:2 with Internal Breath Retention)
Technique 4/Stage 1: Intro (Ratio 1:1:1:1 with Internal & External Retention)
Technique 4/Stage 1: Practice (Ratio 1:1:1:1 with Internal & External Retention)
Technique 4/Stage 2: Intro (Ratio 1:1:2:1 with Internal & External Retention)
Technique 4/Stage 2: Practice (Ratio 1:1:2:1 with Internal & External Retention)
Technique 4/Stage 3: Intro (Ratio 1:2:2:1 with Internal & External Retention)
Technique 4/Stage 3: Practice (Ratio 1:2:2:1 with Internal & External Retention)
Technique 4/Stage 4: Intro (Ratio 1:2:2:2 with Internal & External Retention)
Technique 4/Stage 4: Practice (Ratio 1:2:2:2 with Internal & External Retention)
2 Topics
Introduction of Samavritti Pranayama
Practice of Samavritti Pranayama (Ratio of 1:1:1:1)
17 Topics
Basic Technique: Arms Up & Down
Intro: Bhastrika's Variations
Technique 1: Slow Paced Bhastrika Pranayama
Technique 1: Medium Paced Bhastrika Pranayama
Technique 1: Fast Paced Bhastrika Pranayama
Intro: Integration of Alternate Nostrils with Bhastrika Pranayama
Technique 2: Alternate Nostrils with Bhastrika Pranayama (Slow Paced)
Technique 2: Alternate Nostrils with Bhastrika Pranayama (Medium Paced)
Technique 2: Alternate Nostrils with Bhastrika Pranayama (Fast Paced)
Intro: Internal Breath Retention with Bhastrika Pranayama
Technique 3: (Slow) Internal Breath Retention with Bhastrika Pranayama
Technique 3: (Medium) Internal Breath Retention with Bhastrika Pranayama
Technique 3: (Fast) Internal Breath Retention with Bhastrika Pranayama
Intro: External Breath Retention with Bhastrika Pranayama
Technique 4: (Slow) External Breath Retention with Bhastrika Pranayama
Technique 4: (Medium) External Breath Retention with Bhastrika Pranayama
Technique 4: (Fast) External Breath Retention with Bhastrika Pranayama
4 Topics
Diaphragmatic Breathing
Thoracic Breathing
Clavicular Breathing
Full Yogic Breath Explained
7 Topics
Technique 1: Explanation & Practice: Shatkarma Method
Technique 2: Intro: Alternate Nostrils No Breath Retention
Technique 2: Practice: Alternate Nostrils No Breath Retention
Technique 3: Intro: Alternate Nostrils Internal Breath Retention
Technique 3: Practice: Alternate Nostrils Internal Breath Retention
Technique 4: Intro: Alternate Nostrils Internal & External Breath Retention
Technique 4: Practice: Alternate Nostrils Internal & External Breath Retention
5 Topics
Science of Ujjayi Pranayama
Introduction of Ujjayi Pranayama
Benefits & Contraindications of Ujjayi Pranayama
Technique 1: Practice: Ujjayi Pranayama (Without Breath Retention)
Technique 2: Practice: Ujjayi Pranayama (With Breath Retention & Ratio of 1:1:1)
5 Topics
Technique 1: Intro & Practice (With Alternate Nostrils)
Technique 2: Intro: Only Right Nostril Breathing
Technique 2/ Stage 1: Practice: Only Right Nostril Breathing (Without Retention)
Technique 2/ Stage 2: Intro: Only Right Nostril Breathing (With Retention)
Technique 2/ Stage 2: Practice: Only Right Nostril Breathing (With Retention)
4 Topics
Introduction of Sheetali Pranayama
How to do Sheetali Pranayama?
Technique 1: Practice: Sheetali Pranayama (Without Breath Retention)
Technique 2: Practice: Sheetali Pranayama (With Breath Retention)
4 Topics
Introduction of Sheetkari Pranayama
How to do Sheetkari Pranayama?
Technique 1: Practice: Sheetkari Pranayama (Without Breath Retention)
Technique 2: Practice: Sheetkari Pranayama (With Breath Retention)
5 Topics
Technique 1: Intro & Practice (With Alternate Nostrils)
Technique 2: Intro: Only Left Nostril Breathing
Technique 2/ Stage 1: Practice: Only Left Nostril Breathing (Without Retention)
Technique 2/ Stage 2: Intro: Only Left Nostril Breathing (With Retention)
Technique 2/ Stage 2: Practice: Only Left Nostril Breathing (With Retention)
1 Topic
Explanation & Practice of Bhramari Pranayama
2 Topics
Introduction of Kaki Pranayama
Practice of Kaki Pranayama
4 Topics
Introduction of Viloma Pranayama
Technique 1: Practice: Viloma Pranayama (Interruption of Inhalation)
Technique 2: Practice: Viloma Pranayama (Interruption of Exhalation)
Technique 3: Practice:Viloma Pranayama (Interruption of Inhalation & Exhalation)
3 Topics
Respiratory System
Lung Volume & Capacity
Internal & External Respiration
6 Topics
Pancha Koshas - 5 Layers
Chakras Explained
Prana & Nadis
Upa Pranas (5 Minor Pranas)
3 Bodies of our Existence
5 Elements of Body and Universe
4 Topics
How to remember the Benefits & Contraindications?
Which is the best Pranayama?
Can we use Incense Sticks during Pranayama?
What should we practice first - Meditation or Pranayama?
3 Topics
The Art of Sequencing Yoga
Importance of Silence
Importance of Voice Modulation & Tonality (Tips & Tricks)
Pranayama (Breathwork) Teacher Training (Yoga Alliance)


Thank You!
Your review has been submitted successfully.