Arduino For Beginners - 2024 Complete Course by Udemy
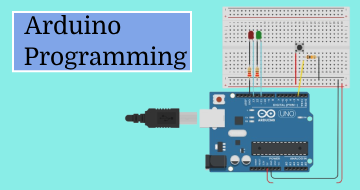
Arduino Step by Step | Robotics | Hands-on | Arduino Projects | Home Automation | Arduino Programming
Course Highlights
- Master your Arduino, starting from scratch
- Become confident to create your own Arduino projects
- Create an interactive obstacle detection application
- Build your own Arduino circuit with many hardware components
- Program the Arduino with C/C++
- Create an online simulation of the course project
- Learn through hands-on lessons
- Practice a lot with 20 activities and a big final project
- Learn by doing and not just watching
- Understand the “why” behind things
- Start directly with the best practices
- Develop an engineer mindset when solving problems
- Setup and optimize the Arduino IDE
- Master digital and analog pins
- Work with LEDs, push buttons, potentiometers
- Communicate between your Arduino and your computer through Serial
- Save values on the Arduino with EEPROM
- Solve the delay problem with millis and micros
- Multitask your programs
- Debounce a push button
- Discover Arduino interrupts
- Use interrupts with the ultrasonic sensor
- Measure distances with an ultrasonic sensor
- Print text with a 16x2 LCD screen
- Control the Arduino with an InfraRed remote controller
- Measure luminosity with a photoresistor
- Install an Arduino library with different versions
Skills you will learn!
Curriculum
5 Topics
Welcome!
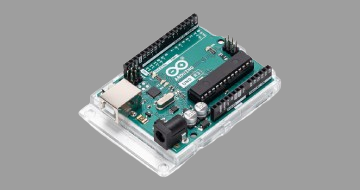
What is Arduino?
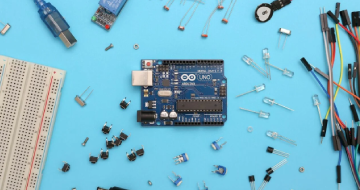
List of Materials for this Course + Recommendations
Online Simulation - Quick Overview
How to get the most out of this course
5 Topics
Intro
Install the Arduino IDE on your Computer
Customize your Arduino IDE for Better Readability
Connect your Arduino board and Find it on the Arduino IDE
Simulation - Create a Tinkercad account + How to Get Started
8 Topics
Intro
Arduino Setup and Loop Functions
Your First Arduino Project: Make an LED Blink
Debug Your Projects with the Serial Monitor
How to Restart your Arduino Program (Different ways)
Simulation - Your First Program + Debug + Restart
Activity 01- Change the LED Blink Rate and Print a Message when it Turns on/off
Activity 01 - Solution
6 Topics
Intro
Understand How a Breadboard Works
Decrypt the Color Code From Resistors
Quick Recommendations on Hardware Manipulation - PLEASE WATCH
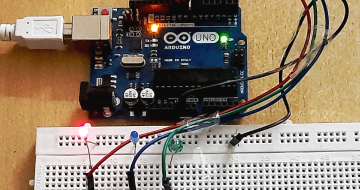
Create a Circuit with 1 LED and 1 Resistor
Make your new LED Blink
9 Topics
Intro
Variables
Data Types
Functions
Scope
Conditions
Loops
Arrays
Recap
7 Topics
Intro
How Digital Pins Work as Output Pins
Set a Digital Value - Power on an LED
How Digital Pins Work with Analog Values (PWM)
Set an Analog Value - Change the Brightness of an LED
Activity 02- Make an LED Fade in/out
Activity 02 - Solution
7 Topics
Intro
Add a Push Button to Your Circuit
How Digital Pins Work as Input Pins
Read a Digital Value - Detect When the Button is Pressed
Activity 03 - Power on an LED Only if the Button is Pressed
Activity 03 - Solution
A Nice Additional Tool to Visualize Data on the Arduino IDE - Serial Plotter
7 Topics
Intro
Add a Potentiometer to Your Circuit
How Analog Pins Work
Read an Analog Value From the Potentiometer
Activity 04 - Set the LED Brightness with the Potentiometer
Activity 04 - Solution
Extra: Use an Analog Pin as a Digital Pin
8 Topics
Intro - Arduino Pins Recap
Add 2 More LEDs to Your Circuit
Activity 05 - Create a Small Traffic Light System
Activity 05 - Solution
Activity 06 - Blink 3 LEDs When the Button is not Pressed
Activity 06 - Solution
Activity 07 - Improve The Previous Project with Functions and Arrays
Activity 07 - Solution
6 Topics
Intro
Send Data with Serial
Receive Data with Serial
Change Serial Baud Rate for Faster Communication
Activity 08 - Set an LED Blink Rate from the Serial Monitor
Activity 08 - Solution
11 Topics
Intro
Pause the Execution with delay() and delayMicroseconds()
The Problem with delay()
Get the Time with millis() and micros()
Compute the Duration of an Action
The Solution to Avoid Using delay()
Blink Multiple LEDs without delay()
Activity 09 - Re-write the Previous Activity on Serial without delay()
Activity 09 - Solution
Activity 10 - Multitask: Run 3 Actions Simultaneously
Activity 10 - Solution
6 Topics
Intro
The Bounce Problem - Experiment
The Bounce Problem - Explanation
Debounce the Push Button
Activity 11 - Toggle a Different LED when Pressing on the Button
Activity 11 - Solution
7 Topics
Intro
What are Interrupts When to Use Them
Set up an Interrupt in Your Program
Software Debounce Inside an Interrupt
Warnings About Interrupts - When to use/not to use
Activity 12 - Count How Many Times you Press on the Push Button with Interrupts
Activity 12 - Solution
5 Topics
Intro
What is EEPROM When to Use it
Save and Retrieve Values with EEPROM
Activity 13 - Save an LED Max Brightness for the Next Program Run
Activity 13 - Solution
10 Topics
Intro
Add the Ultrasonic Sensor to Your Circuit
How the Ultrasonic Sensor Works + pulseIn() function
Get the Distance From an Obstacle
Activity 14 - Measure the Duration of the pulseIn() Function
Activity 14 - Solution
Use the Ultrasonic Sensor with Interrupts Instead of pulseIn()
Activity 15 - Power on a Different LED Depending on the Distance From an Obstacl
Activity 15 - Solution
Extra - Improve the Stability of the Ultrasonic Sensor
8 Topics
Intro
Add the LCD Screen to Your Circuit
Print Text on the LCD Screen + Tune it with the Potentiometer
Play with the LCD Cursor
Activity 16 - Print Serial Input on LCD Screen
Activity 16 - Solution
Activity 17 - Print Distance From Obstacle on LCD Screen
Activity 17 - Solution
10 Topics
Intro
Add the IR Receiver to Your Circuit
Install a new Arduino Library with the Arduino IDE
Get Data From the IR Remote Controller (Library v2)
Change Library Version (v3) and Get Data From the IR Remote Controller
Map the Data You Read with the Controller’s Buttons
Use a Switch Structure to Handle IR Commands
Activity 18 - Choose which LED to Power on with the Remote Controller
Activity 18 - Solution (Part A)
Activity 18 - Solution (Part B)
7 Topics
Intro
Add the Photoresistor to Your Circuit
Read the Luminosity from the Photoresistor
Activity 19 - Power on LEDs if it’s Getting too Dark
Activity 19 - Solution
Activity 20 - Compute the Average Luminosity Over a Period of Time
Activity 20 - Solution
15 Topics
Intro - Project Overview and Final Result
Step 1 - Get Distance with Ultrasonic Sensor
Step 2 - Change LED Blink Rate Depending on the Distance
Step 3 - Lock the Application When an Obstacle is Detected
Step 4 - Unlock the App with the Debounced Push Button
Step 5 - LCD Setup and Welcome Message
Step 6 - Print Distance and Warning Message on LCD Screen
Step 7 - Setup IR Remote Controller and Map Buttons
Step 8 - Unlock the App when Pressing on the Play Button
Step 9 - Change and Save (EEPROM) the Distance Unit
Step 10 - Switch Between Different LCD Screens and Reset Settings
Step 11 - Print Luminosity and Adjust the Lighting from the Photoresistor
Simulation - Code with Version 2 of the IR remote Library
Project Conclusion - Going Further
Tips and Best Practices to Create Your Own Arduino Project
3 Topics
What You’ve Learned
What to do next
Bonus Lecture
Arduino For Beginners - 2024 Complete Course
Related Arduino Courses


Thank You!
Your review has been submitted successfully.